


Building your own website feels dangerously close to an exercise in escaping a straight jacket.
It’ll drive even the most adventurous newbie to insanity.
Domains…hosting…themes…plugins…widgets…it’s ridiculous how easy people make this shit look, right?
I’m not sure what’s more defeating, the ass sweat inducing choices around every corner, or the tech that stops you dead in your tracks again and again.
Oh, the tech!
The endless hours you’ve spent Googling all this new terminology and watching tutorials that sound like they’re speaking a foreign language are hours you’ll never get back. {heavy sigh}
And even after all that research, you’re still not sure what the fuck the difference between a widget and a plugin is.
Building your own website can be a bitch!
Until now.
Resist the temptation to turn your attention to building a fully functional blanket fort, and let me take you click by click and screen by screen through setting up your WordPress website from scratch!
I’ll even show you how to design the hell outta that sumabitch in my new WordPress Website in a Weekend masterclass!
But first…
I’m going to walk you step-by-baby-step through setting up a WordPress website. Everything from buying your domain, to launching your website into the world, and every click in between.
So without further adieu, let’s get our WordPress on!…
 CHOOSE & PURCHASE A DOMAIN
First and foremost you need a destination to call your kickass website home. Sooooo, the first order of business is to choose and purchase your domain, if you don’t already own one.
My go to spot to buy domains is GoDaddy.
A couple of things to keep in mind when selecting your domain:
- Try to include relevant keywords
- Make sure there are no hard to spell words
- Don’t include any numbers or symbols
- Aim to choose a ‘.com’ extension {it’s not the end of the world if you go with another extension, just make sure there’s a very well thought out reasoni behind any choice you make on your domain name}
 BUY A HOSTING PLAN
The next order of business is buying real estate to host your website on. That’s where picking a hosting plan comes in.
One of my go to hosting companys is Bluehost {affiliate link}.
I love Bluehost because they:
- Have super responsive 24/7 customer support
- Back everything with a 100% money back guarantee
- Make purchasing your hosting painless and newbie friendly
I know hosting can seem like a scary thing but it’s really easy peasy!…especially when you go with Bluehost.
Here are screenshots to walk you through the whole process of buying a hosting plan through Bluehost:
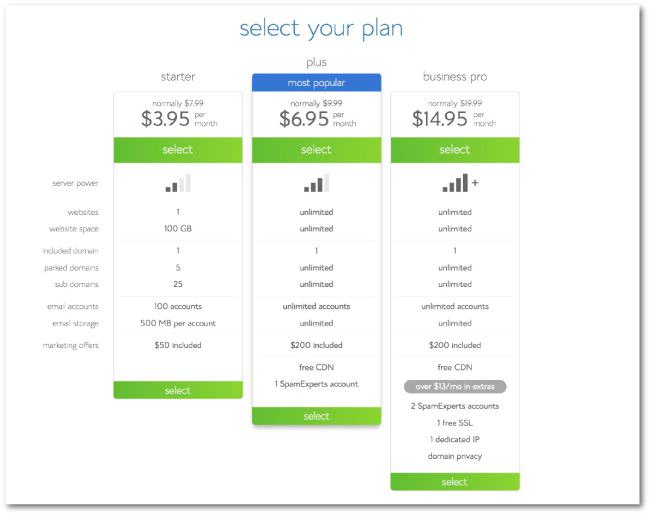
Visit Bluehost and select your plan.
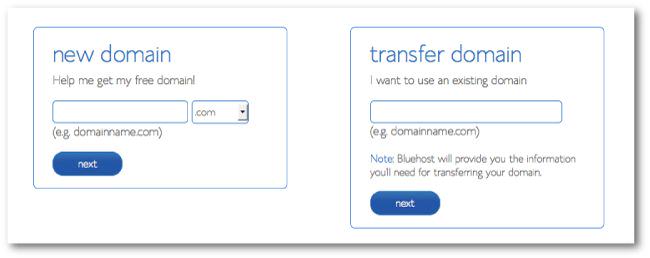
Select whether you have a domain that you’ll be transferring, OR if you need to purchase your domain.
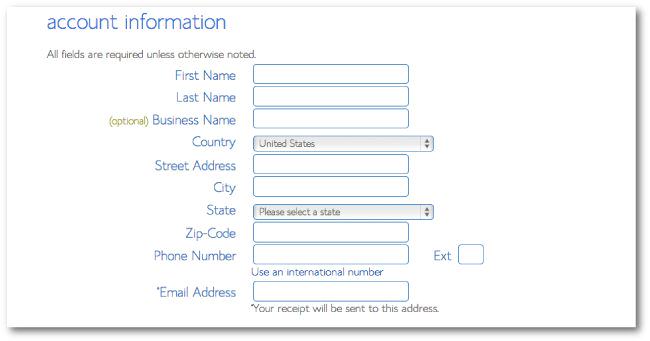
Fill out you personal deets for checkout.
Double check that the plan you selected is what’s been added to your cart and fill out your credit card deets.
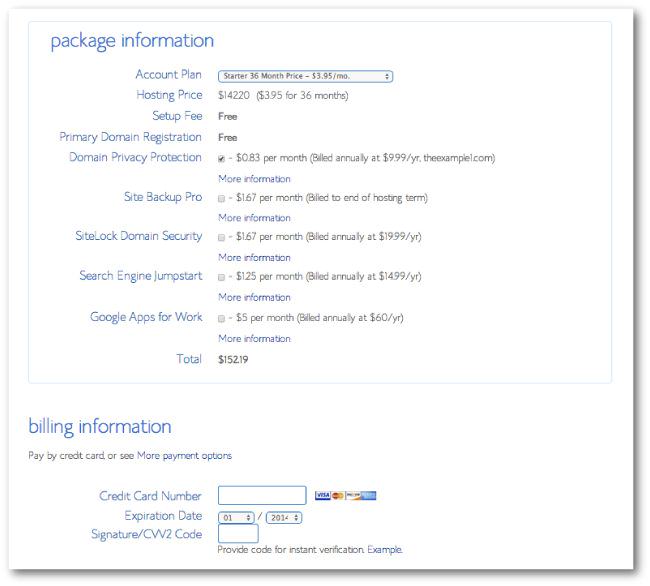
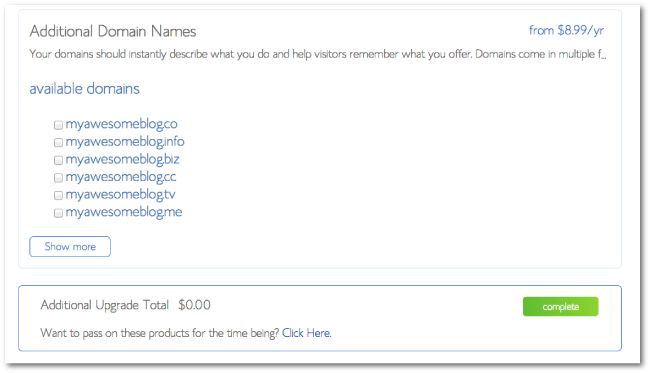
Specify whether you want any additional variations of your domain, which is most times not something to bother with.
Either way make your selection and complete your purchase.
The last thing you need to do to create your hosting account is to choose a password.
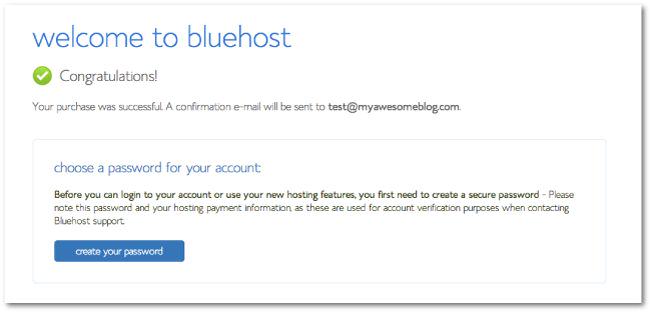
Enter your password.
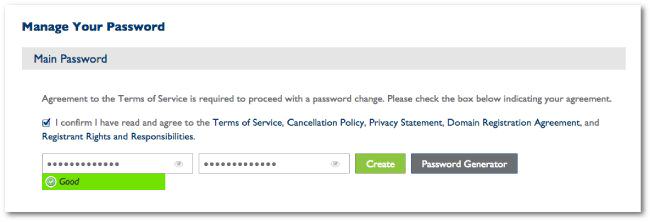
And voila, you’ve got your Bluehost account locked and loaded.
Wins come in ALL sizes, so take a minute to get your champagne clinks on, because you just bought yourself some web real estate!
Every empire starts with a investment, so congrats on claiming your slice of the web.
 CHOOSE A WORDPRESS THEME
Now it’s time to choose a theme to load on your website.
So, let’s break down how to junk punch all that overthinking that comes with choosing a theme, so you quickly pick a theme that fits your brand {and goals} like a glove.
Before you EVER start looking for theme you need to know what type of website you’re going to be building and what features you will need.
For example:
Will you need a portfolio?
Will you need a landing page {opt-in page} template?
Will your website be heavy on photography?
Templates come in all shapes and sizes as far as the types of pages they provide, so knowing what you need will help you eliminate what won’t work, making your decision a lot easier.
Come hell or high water, the theme you choose better:
1. Support any 3rd party plugins you think you might use {I.e. WooCommerce, Shopify, Amazon affiliates, etc}
2. Have up to date customer support and detailed theme documentation, in case you run into issues
3. Be mobile responsive
4. Have options for customizing {for colors, images, fonts, etc}
For these reasons and a shit load more I swear by Studiopress themes for all my sites and my client’s sites, because they are powered by the Genesis Framework.
Holy new terminology!
What the hell is a framework?
Think about it as the bones of your site.
The framework is where the FUNCTIONALITY of your site resides.
The theme, which is layered over the framework, is where the STYLE of your site resides.
Why does this double duty approach reign supreme?
The better question is…Do you want a WordPress update to fuck up your entire site?
Hell no!
Having a framework means that updates {which only need to be applied to the functionality} are kept totally separate from the design of your site.
Which will give you invaluable peace of mind when you hit that {not so} scary update button. Bugs are no match for Genesis!
Put THAT in your pipe and smoke it. ?
I sing the praises of the Genesis Framework because it has:
- Rock solid security
- Blazing fast performance
- Out of the box SEO
- 100% mobile responsive themes
- Easy to customize CSS stylesheets
Later on in this post, I’ll show you exactly how and where to install the framework AND your theme, so hold tight…I’ve got you covered.
I told you, we’re going click by click, baby!
 INSTALL WORDPRESS ON YOUR DOMAIN
Before you can install your new theme on your domain you need to install WordPress on your domain first, and you’ll do that through your hosting account.
A quick Google search will net you the instructions you need for your hosting provider, but if that’s Bluehost I’ve got you covered.
Here are a few screenshots to walk you through the whole process of installing WordPress on your Bluehost hosting account:
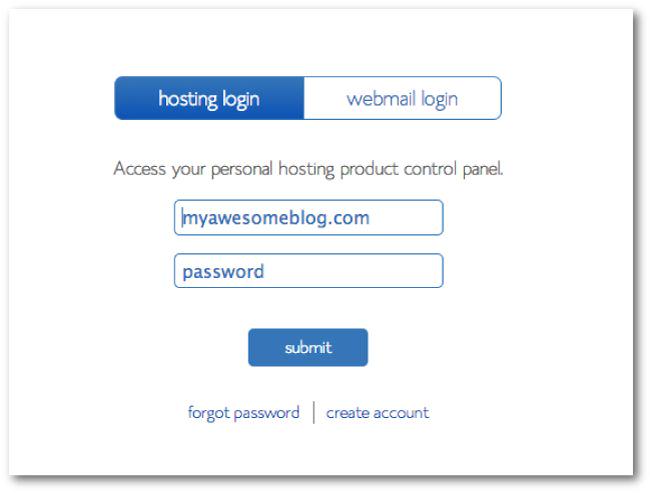
Login to your Bluehost hosting account, using the login you setup in step# 2.
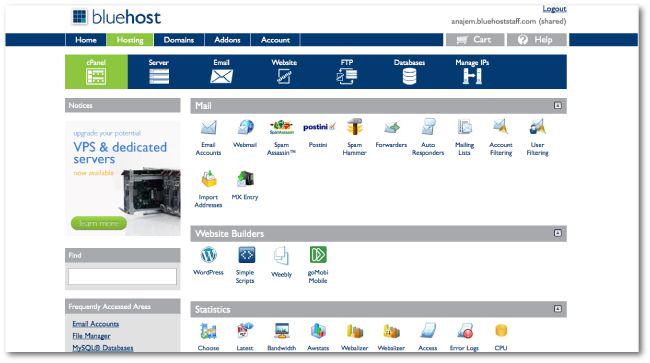
Select ‘WordPress’ under the Website Builder section.
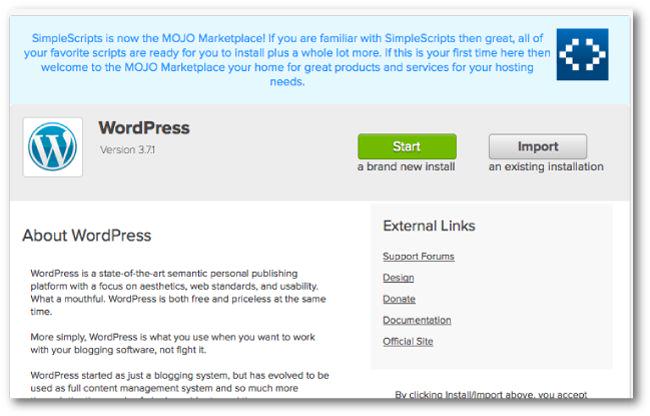
Click the green ‘Start’ button.
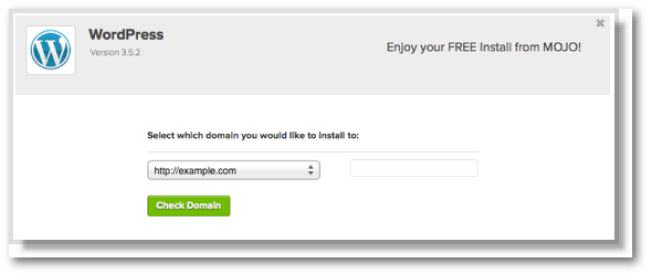
Choose the domain that you want to install WordPress on, which will likely be the only domain in your account.
Wait as Bluehost prepares to begin installing WordPress.

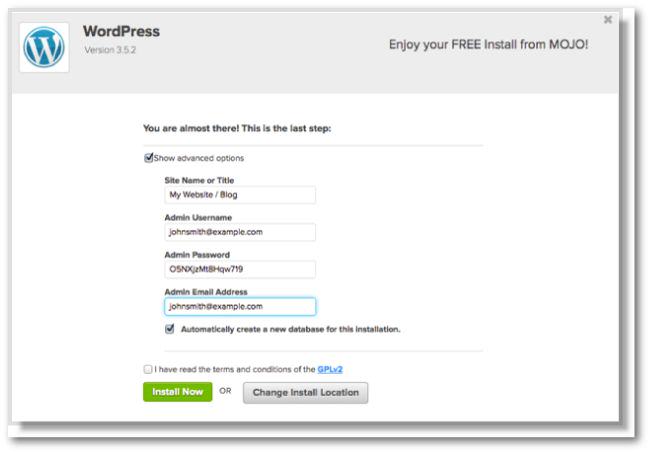
Next, you’ll need to a WordPress login username and password for your website. These are the credentials you’ll use to login to your website once Bluehost installs WordPress on your domain.
Tip: Make sure and use the email that you want all notifications and other website type emails to come to.
Make sure you copy and paste your username and password somewhere for safe keeping. These login deets are the gateway to your website.
Guess what time it is?
Happy dance time, of course!
Yup, another win, baby. You’ve just installed WordPress on your domain and you’re ready to start building your website. Wooohooooo!

 INSTALL YOUR YOUR FRAMEWORK AND/OR THEME
With your WordPress theme in hand, and by hand I mean the zip file you got from me or received from the theme seller you purchased from, it’s time to install your theme.
Important Note: Remember, if you’re using a Studiopress theme you will ALSO need to install the Genesis Framework {which is a separate zip file from your WordPress theme} in order to activate your Studiopress theme.
If you’re using the Genesis Framework, you’re going to install that FIRST, and then rinse and repeat this process to install your theme. All of the steps will be exactly the same.
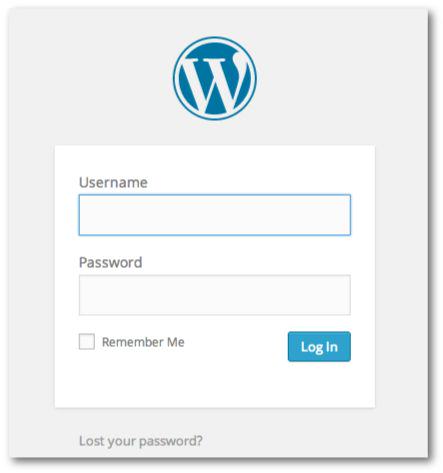
Grab the login credentials {including the url, username and password} you saved from step# 4 and login to your website.
Tip: Your login url will always be www.yourdomain.com/wp-admin. There you will see this screen…
After you login, you’ll see your WordPress dashboard, which will look like this…
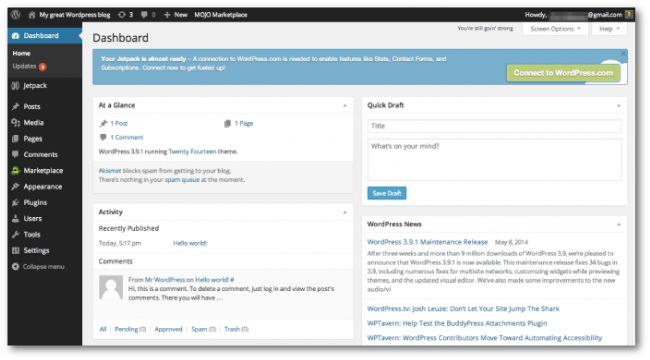
To install your framework and/or theme, select ‘Appearance’ in the menu to the left, then ‘Themes’.
Click the ‘Add’ button.
Click the ‘Upload Theme’ button
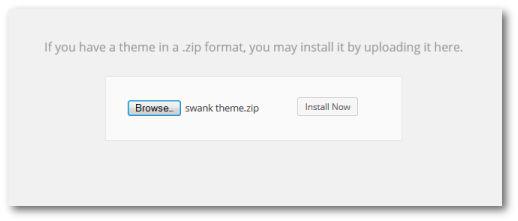
Click ‘Browse’ and select the zip file of your theme. Or framework if you’re using one.
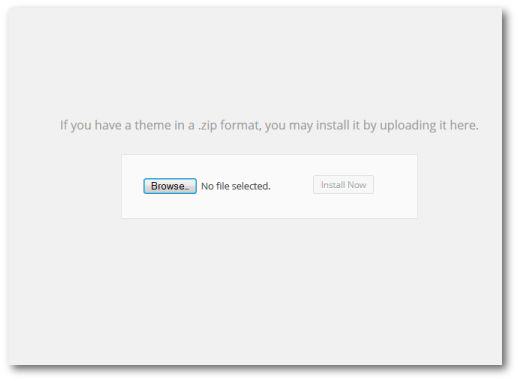
Click ‘Install Now’.
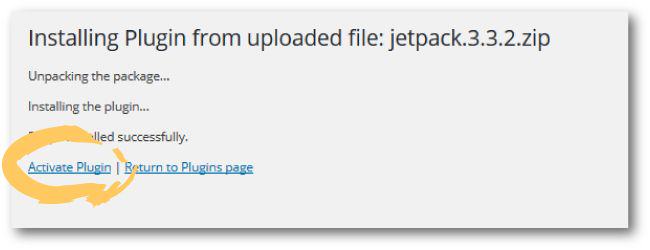
Once the framework/theme is installed you will see a message like the screenshot below.
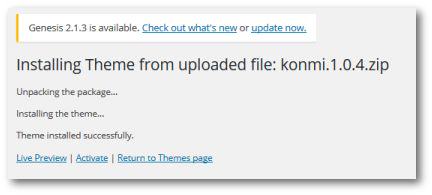
If you’re using a framework, you’ll now repeat step# 5 and install your theme.
Once you’ve install your theme you want to click ‘Activate’ on the screen above.
Don’t click ‘Activate’ for the framework…that bad boy doesn’t need to be activated, it just needs to be installed.
If you accidentally click ‘Activate’ on the framework, don’t panic, all you need to do is go back into your themes using the left bar menu {Appearance > Themes} and choose ‘Activate’ under your theme.
 GET YOUR HOUSEKEEPING OUT OF THE WAY
There are quite a few settings that you need to adjust when setting up a WordPress website.
Here’s a list of the housekeeping items you want to address:
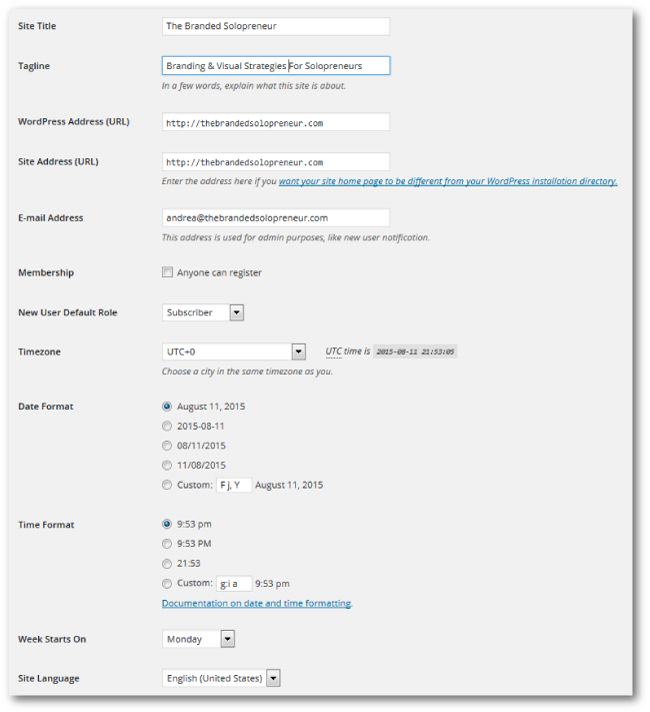
Setup Your General Settings
Select ‘Settings’ then ‘General’ in the left side menu.
Fill out and adjust the following fields:
- Site Title
- Tagline
- WordPress Address {URL}
- Site Address {URL}
- E-mail Address
- Update the Date Format to your preference
- Update the Time Format to your preference
- Choose the date of the week you’d like WordPress to recognize what day the Week Starts On
Click ‘Save Changes’.
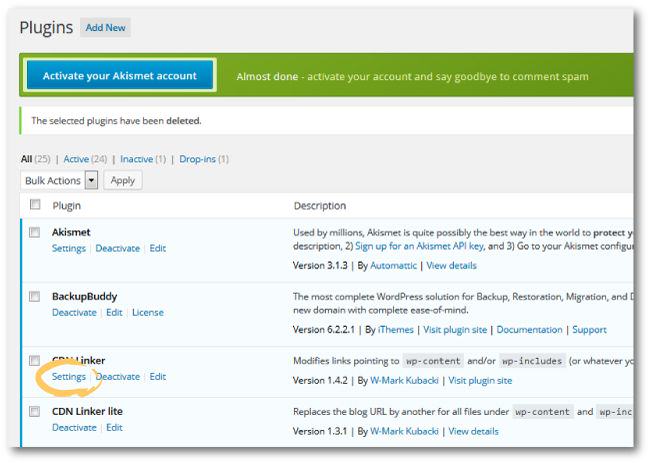
Delete The Default Plugins, Themes, and Content
Now it’s time to clean things up and delete all the default shit that is on your website after you install WordPress.
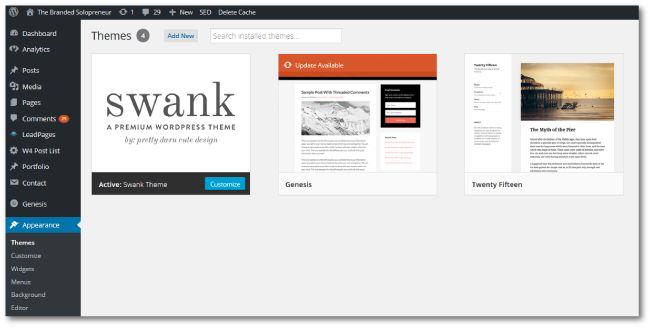
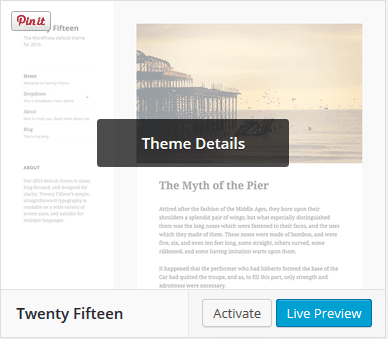
Select ‘Appearance’ then ‘Themes’ from the left side menu.
Now hover over one of the existing themes {NOT your chosen theme or the Genesis Framework} until you see a black ‘Theme Details’ button appear. Click that button.
Tip: Leave the theme for the current year you’re in, but delete all of the older years. {I.e it’s 2017 so I would keep the Twenty Seventeen theme, and delete themes Twenty Fifteen and Twenty Sixteen, etc.} The more themes you have loaded on your site the slower it will load, which is no bueno!
Click ‘Delete’ which is located at the bottom right corner of the screen that pops up.
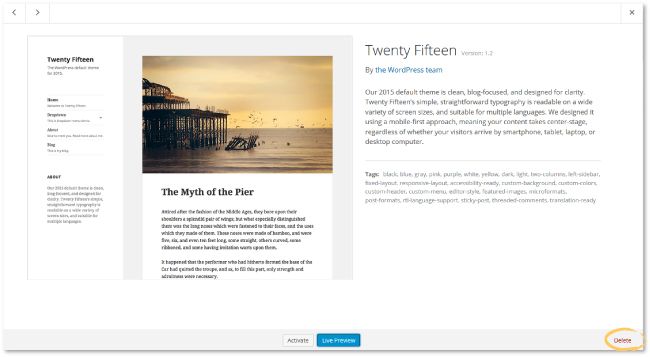
When the confirmation screen appears select ‘OK’.

Repeat that process for all years but the current year.
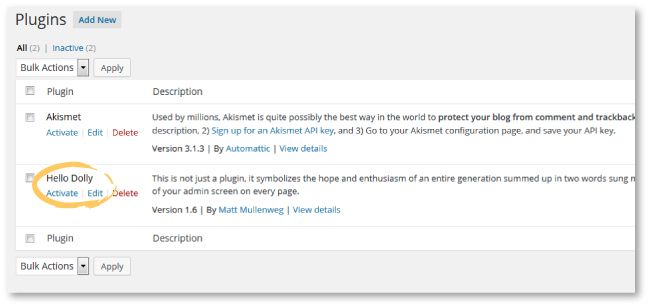
Now, let’s move on to the plugins.
Select ‘Plugins’ from the left side menu and delete the ‘Hello Dolly’ plugin. This is just a placeholder plugin that has no actual functionality.
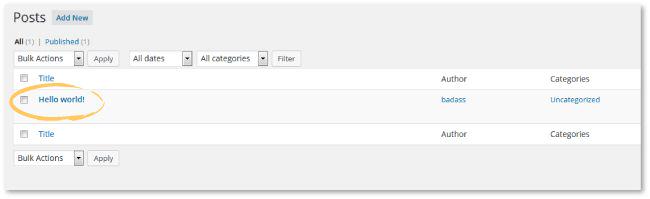
Lastly, let’s delete the default blog post that WordPress created.
Select ‘Posts’ then ‘All Posts’ in the left side menu.
Hover over the ‘Hello World!’ post until the option ‘Trash’ comes up and select that to delete the post from your site.
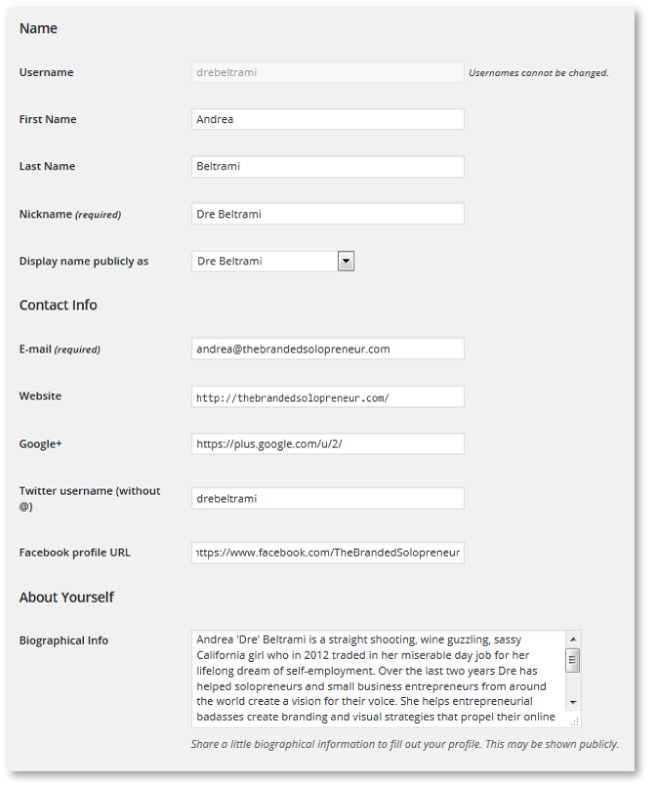
Setup Your User Profile
Select ‘Users’ then ‘Your Profile’ in the left side menu.
Fill out and adjust the following fields:
- Choose the color scheme you would like the WordPress dashboard to have
- First Name
- Last Name
- Nickname
- Choose the name you would like your website to display publicly
- Website
- Google+ link {if you have an active profile}
- Twitter handle
- Facebook Profile link
- Biographical Information {short bio}
Click ‘Update Profile’ to save your changes.
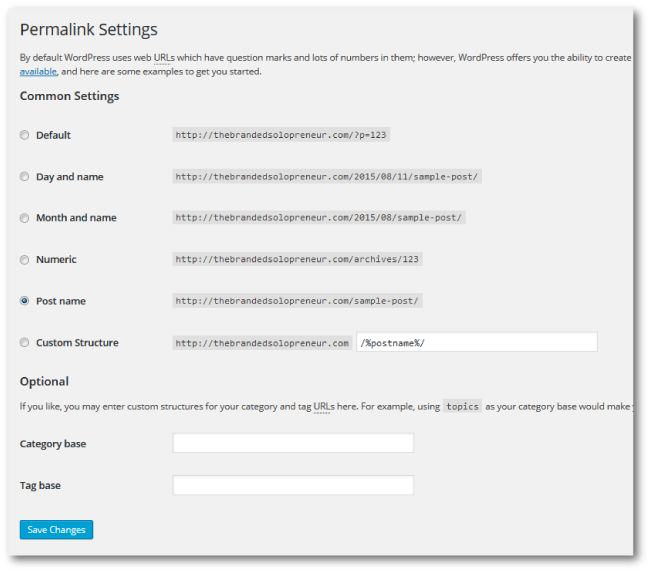
Update Your Permalinks
Select ‘Settings’ then ‘Permalinks’ in the left side menu and choose ‘Post Name’ for your permalink style.
Click ‘Save Changes’.
Upload A Favicon
A favicon is the icon that appears in a browser tab when your website is opened.
It looks like this…

Some themes have a setting under ‘Appearances’ > ‘Customize’ in the left side menu, and other themes require you to add CSS coding to your style sheet to add a favicon.
Read your theme documentation to find out how to go about uploading a favicon for your website.
A couple tips for your favicon:
- It should be a 16 x 16px image
- You need to save the image as favicon.ico {‘ico’ is the file format}
- The best designs are either symbols or an initial, don’t try and put anything more or it will be completely unreadable
 CUSTOMIZE THE THEME WITH YOUR BRAND STYLE GUIDE
Now it’s time to make your WordPress theme one of a kind!
There are 6 main visual elements that you need to customize with your branding guidelines:
- Header {which should include your logo and tagline at a minimum}
- Fonts
- Color Palette
- Decorative elements {which can include patterns, lines/separators, frames, bullet-points, icons, etc}
- Branded images
- Social Buttons {which include the buttons to your social profiles AND your social sharing buttons <— affiliate link}
Some of these changes will require some CSS coding {depending on your theme}, so you’ll need to familiarize yourself with how to make changes to your Custom Style Sheet, which is something I cover in blow your fucking mind detail in my WordPress Website in a Weekend masterclass.
When it comes to taking the vanilla out of your theme and making it your own it’s all in the custimizations you can do with CSS coding, so don’t let your fear of tech saddle you with B-O-R-I-N-G!
You can see how painstakingly detailed I get with my content in this post. My WordPress masterclass will put this click by click tutorial to shame with it’s newbie/tech phobe friendly how to.
Sooooo, if coding is one of those thangs that gives you a wicked case of ass sweats, this masterclass will cure you right up! Grab your spot here.
Now, if DIY ain’t your thang and you have the chedda to hire someone, let my boys over at WP Radius {<—-affiliate link} do it all for ya!
For $67/month they’ll make unlimited changes, including CSS tweaks, to your website for you. It’s the best WordPress support & maintenance on the market!
And the best part is you can cancel anytime, so you can hire them for a month or two while you build your site and then say adios without the awkward breakup conversation.
 ADD YOUR PAGES, BLOG POSTS, AND OTHER CONTENT
Now that you’ve tweaked and coded your WordPress theme so that it’s seamlessly styled with your signature brand style it’s time to load your website up with content.
There are 6 main pages that every website should have:
- Home
- About
- ContactBlog
- 404 {which is the page that appears anytime someone hits a dead or broken link on your site}
- Services or Work With Us/Me
Other pages you might want to create as well are:
- Free Resources
- Courses
- Portfolio
- Testimonials
- Landing page {with some kind of killer opt-in offer}
In my WordPress Website in a Weekend masterclass I walk you step-by-step through how to create KILLER opt-in pages, thank pages, and sales pages so you can build your list and sell your products on YOUR website. Who needs one more expense like Leadpages, yo!
Teaser: I’m also going to show you how to bring in the Benjamins with your thank you pages. {GASP!}
NOW, LET’S TALK ABOUT THOSE THREE DAUNTING LETTERS…SEO.
An often left out or overlooked part of a newbie’s content strategy is SEO.
I know, I know, the 3 most dreaded letters out there. Well, after CSS, of course.
If you’d like to have your membership to ‘Club SEO Overwhelm’ revoked, there’s one plugin that’ll do it.
Yoast SEO meet newbie…newbie meet Yoast SEO! You two are going to be best fucking friends.
The Yoast SEO plugin will insert a section below your posts and pages in WordPress that has each of the fields you need to fill in to optimize your content for maximum search ranking.
It will also provide a grading scale for specific elements on your page, which it rates with a green, orange or red light, which tells you exactly what the grading is based on.
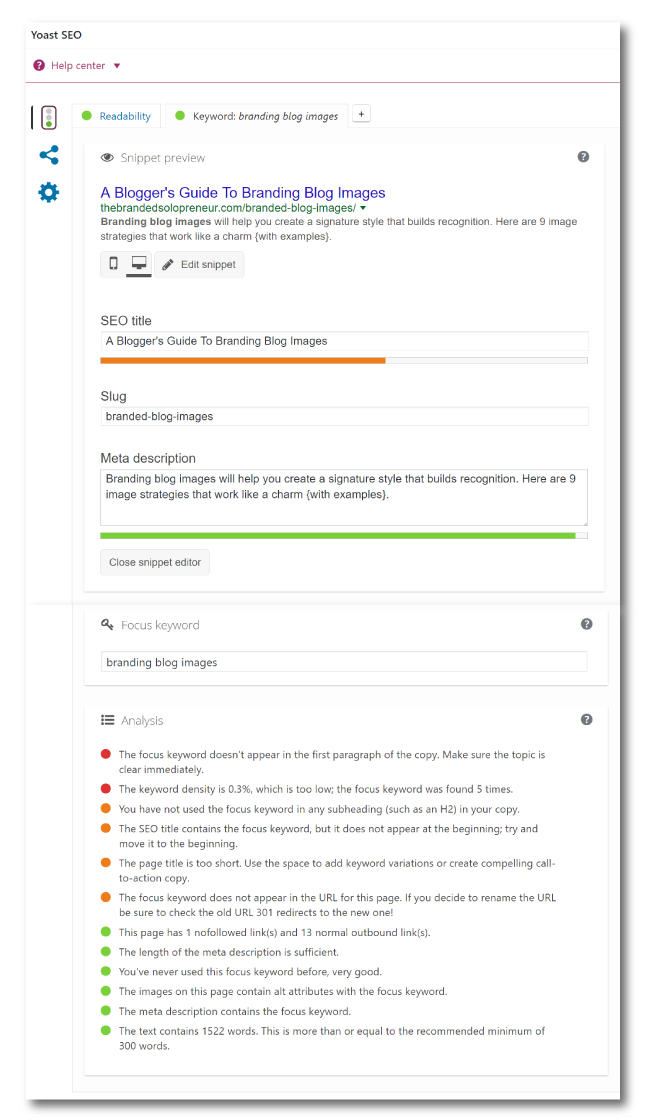
What you want to do is use the Google Adwords Keyword Planner to choose a relevant keyword that you’re going to target for each post and page you create, and then fill in the fields in the Yoast SEO plugin with the required information.
The 4 fields you need to fill out are:
- Meta title
- Slug {which is the portion after your domain – i.e www.yourdomain.com/this-is-your-slug}
- Meta description
- Keyword you’re targeting
You also want to sprinkle {in a natural way} your keyword throughout your content.
Yoast SEO will then help you optimize your content with the the grading scale below those fields.
To help you make SEO your bitch here’s A Rookie’s Guide To SEO: 8 Simple SEO Tweaks You Can Make In A Day.
 INSTALL YOUR PLUGINS
Speaking of plugins…
Plugins run actions in the background of your site, giving your website capabilities of all kinds.
Plugins can:
- Add widgets that display different things like sliders, opt-in forms, buttons, and social feeds
- Create contact forms, sitemaps, or list style posts
- Add more toolbars in the visual editor
- Integrate Google Analytics into your site
- Automatically save backups of your site on the cloud or in your Dropbox account
- Cache your images so your site loads faster
- Add social sharing buttons to your posts and pages
- Skies the fucking limit, REALLY!
The 9 plugins EVERY WordPress site needs are:
Google Analytics for connecting analytics to your site
BackupBuddy for setting up automatic backups of your site
PopupAlly to create free customizable opt-in forms for your posts and pages
WP Super Cache to cache the images on your site
Yoast SEO for adding SEO fields into your posts and pages
Contact Form 7 to create completely customizable forms that you can place on any page or post
WordFence to monitor and report any security risks for your site
Akismet for defending your site against comment spam
TinyMCE Advanced for adding more toolbars and functionality to the visual editor {which is the area you will be creating, or adding, content on your posts and pages}
Here are some screenshots to walk you through the process of installing a plugin:
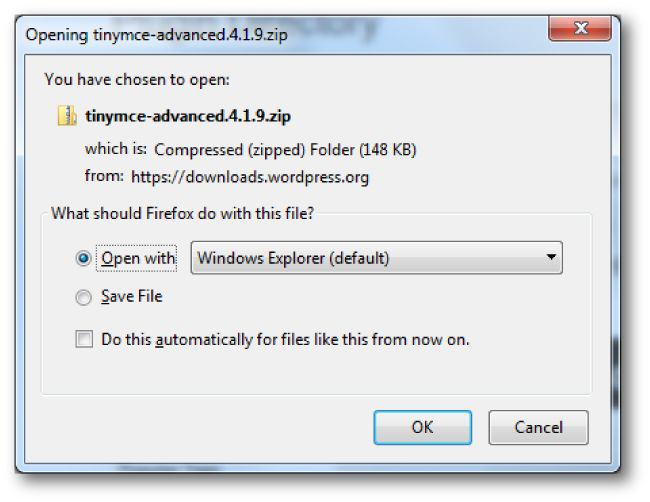
Visit the WordPress plugin page and click ‘Download Version…’ {it’s the orange button}
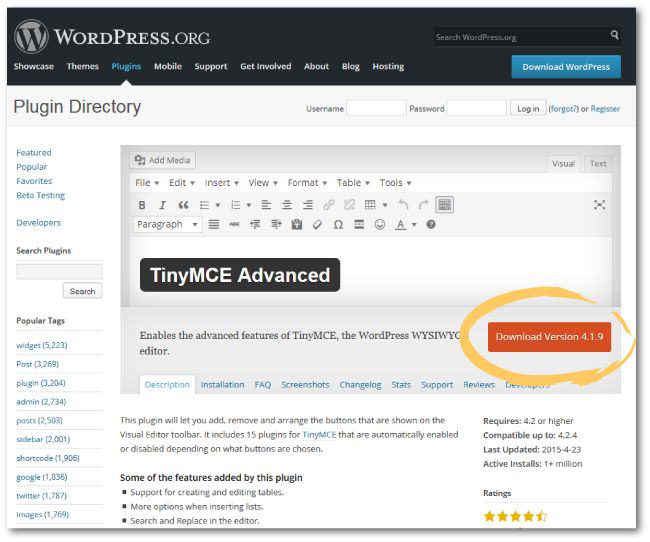
Save the plugin zip file to your desktop.
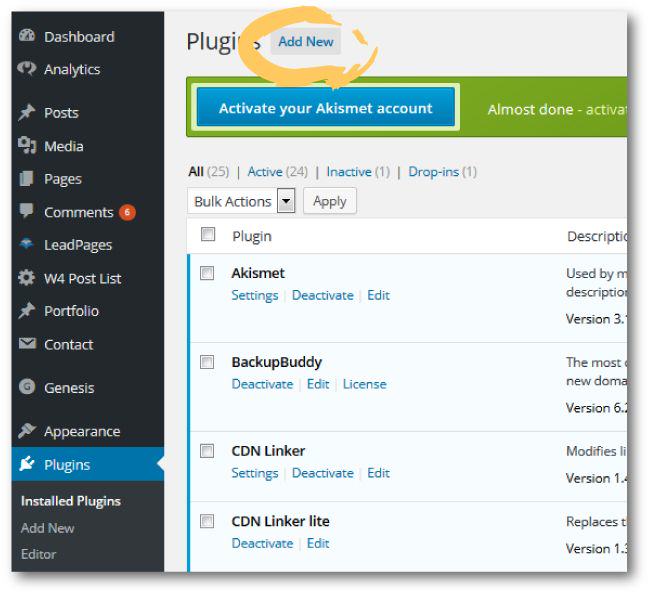
Go back to your WordPress dashboard and select ‘Plugins’ then ‘Add New’ in the left side menu.
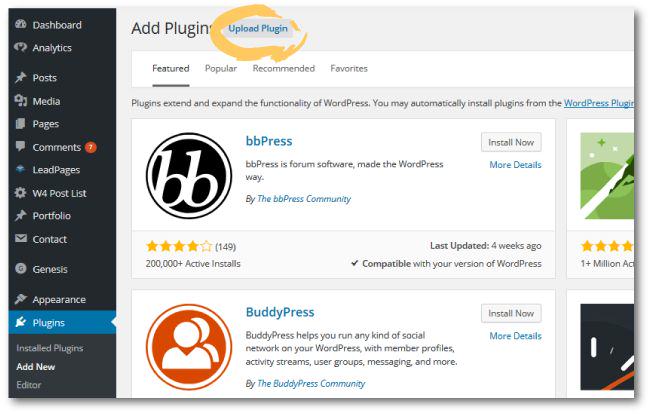
Click the ‘Upload Plugin’ at the top of the screen.
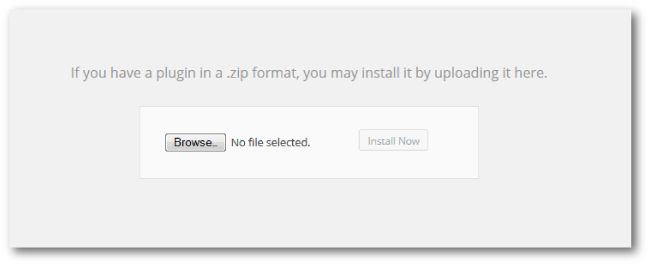
Click ‘Browse’ and select the zip file you saved to your desktop and then click ‘Install’.
When WordPress is done installing the plugin click ‘Activate Plugin’.
Now some of the plugins will need to be setup, so after you install the plugin click “Plugins’ and then ‘Installed Plugins’ in the left side menu and find the plugin you added.
Select ‘Settings’ under the plugin to be taken to the plugin menu. Settings vary depending on the plugin.
There are definitely other plugins you will want to load depending on the functionality that you want to add to your website, but keep in mind that the more plugins you load onto your website the slower it is going to run, which is NOT kickass!
You don’t want to add anything that’s not 110% necessary so do your research, choose wisely, test plugins out, and then DELETE what you aren’t ultimately using.
SUPER COOL FREEBIE FOR YA
 There are two FREE plugins that’ll turn your sidebars {yeah you can have different ones for different posts and pages!} into list building beasts.
If you want to learn how to customize your sidebars so you can have unique content and promote unique offers on specific pages and posts grab my free tutorial below.
It reveals the only two free plugins you need, and walks you click by click through how to set up your sidebars.
Teaser: This is just ONE tasty morsel of the cool shit I’m going to teach you in the WordPress Website in a Weekend masterclass!
 GET FEEDBACK FROM TRUSTED SOURCES
After you’re done setting up your WordPress website, but before you shout from the mountain tops and officially launch your website to the world, it’s important to get feedback from people you trust.
Sometimes we stare at something so long, and put so much blood, sweat, and tears into it that we lose objectivity and things escape us…that other’s can spot right away.
And I’m not talking about just how pretty your site looks, but how FUNCTIONAL it is…and how well it takes a user through your content.
Does it meet your goals?
Does it lend itself to encouraging visitors to take whatever actions you attend them to?
You want to get feedback from someone that understand what you’re trying to accomplish with your site, not just mom…you know she’s ALWAYS going to tell you what you do is breathtaking.
If you don’t have anyone like this never fear, that’s EXACTLY what The Solopreneur Society is all about. This is a 6,000+ private Facebook support group full of solopreneurs ready and willing to provide feedback, help, support and encouragement as you prepare to launch your baby into the world.
If you want MY detailed obsessed eye balls on your site, that’s actually one of bonuses I’m throwing in when you invest in my WordPress Website in a Weekend masterclass.
I’m going to record a page by page review of your site, that will be laden with everything from tips on how you can improve the design, and user experience, to layout and copy suggestions, opt-in ideas, and a ton of other actionable input so you can launch the best damn website your industry has seen!
Can you say BALLER!
 LAUNCH YOUR NEW WEBSITE!
It’s tiiiiiiiiime!
Look, you’re never, ever, ever, ever {did I mention EVER?} going to be done tweaking, adjusting and perfecting your website so don’t wait for that day!
Take a deep breath, and launch that sumabitch.
Reveal it with pride and accept that it’s always going to be a work in progress…and that’s a good thing.
 CREATE OFFERS, PRODUCTS & CONTENT TO DRIVE TRAFFIC TO YOUR WEBSITE
Your main job as the owner of your own profitable piece of web real estate is to continue to create new content paths so you can build your list and sell the shit out of your offers.
Take time to outline your content strategy for AT LEAST the next 6-months. If you don’t, you’re going to end up on a content rampage that leaves you with shit to show for it.
Can you say burn out?
That’s where day drinking and blanket forts start looking real tempting.
BOTTOM LINE: Enjoy the journey and celebrate every fucking milestone along the way! No win is too small to clink too. Don’t be afraid to price shop and check out side-by-side comparisons on pricing plans when it comes to choosing your website host. BUT, understand that a lot more goes into choosing one than just dollars and cents! When it comes to matters of your digital playground, you don’t want to skimp or splurge in the wrong areas.
ONE MORE THING BEFORE YOU GO…
If you want to master CSS like a boss, so you can customize the ish out of your website…grab instant access to my brand spankin new free happy hour training below!
FREE VIDEO TRAINING
MASTERING CSS EVEN IF CODING SCARES THE F OUT OF YOU

CSS obliterates any limitations that come with your website theme, so you can take that bad boy from common to custom in a matter of minutes, which is exactly what I’m going to show you how to do with CSS in this video training! {giddy squeal}